Georeferencing Aerial Imagery
In the tutorial Georeferencing Topo Sheets and Scanned Maps we covered the basic process of georeferencing in QGIS. That method involved reading the coordinates from your scanned map and inputting it manually. Many times though you may not have the coordinates printed on your map, or you are trying to georeference an image. In that case, you can use another georeferenced data source as your input. In this tutorial, you will learn how to use existing open data sources in your georeferencing process.
Overview of the task
We will georeferenced high resolution balloon-imagery using reference coordinates from OpenStreetMap.
Other skills you will learn
- Downloading super high-resolution public domain imagery.
- Using the OpenLayers plugin in QGIS.
- Converting coordinates between different projection using cs2cs command-line tool.
- Using an existing georeferenced layer to input GCP points in the Georeferencer tool.
- Setting a custom no-data value for a layer.
Get the data
In this tutorial, we will be using some gorgeous kite and balloon imagery collected by The Public Laboratory. They make the georeferenced versions of the images also available, but we will download a non-georeferenced JPG image and go through the process of georeferencing it in QGIS. If you like the imagery they provide, you can explore it in Google Earth as well.
Download the JPG image of Washington Square Park, New York. You can right-click the JPG button and choose Save link as....
For convenience, you can also download a copy of this data by clicking on following link: (right-click and choose Save link as....)
Procedure
- For this tutorial, we will be using the OpenStreetMap layer as our reference layer. Install the OpenLayers plugin from Plugins ‣ Manage and install plugins ‣ Get more. See Using Plugins for more information on using plugins in QGIS.
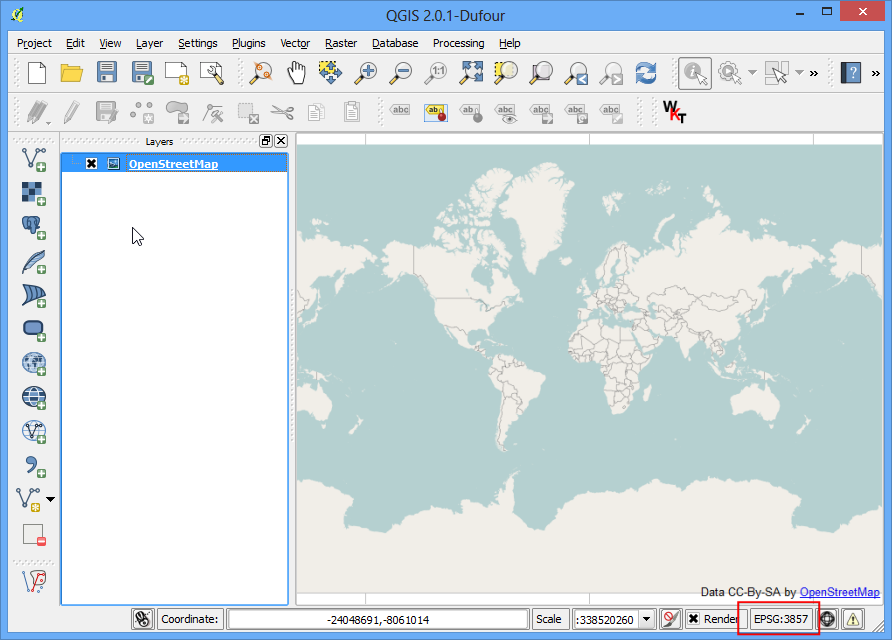
- Once installed, go to Plugins ‣ OpenLayers plugin ‣ Add OpenStreetMap layer. This will add a layer of pre-rendered tiles created from OpenStreetMap data.
- Now you have the OpenStreetMap layer loaded in QGIS. Note the Coordinate Reference System (CRS) for this layer. It is set as EPSG 3857 Pseudo Mercator. This is important to note, since the coordinates we infer from this layer will be in this CRS.
- Now the task is to locate the general vicinity of the area that we are trying to georeference. You can just use Pan and Zoom tools to locate that area on the OpenStreetMap layer. But I will take this chance to demonstrate another tool that may help you in future. We know that the image we downloaded is for Washington Square Park in New York. If you search for that place, you will be able to locate the wikipedia page for it. The coordinates for the park are listed there.
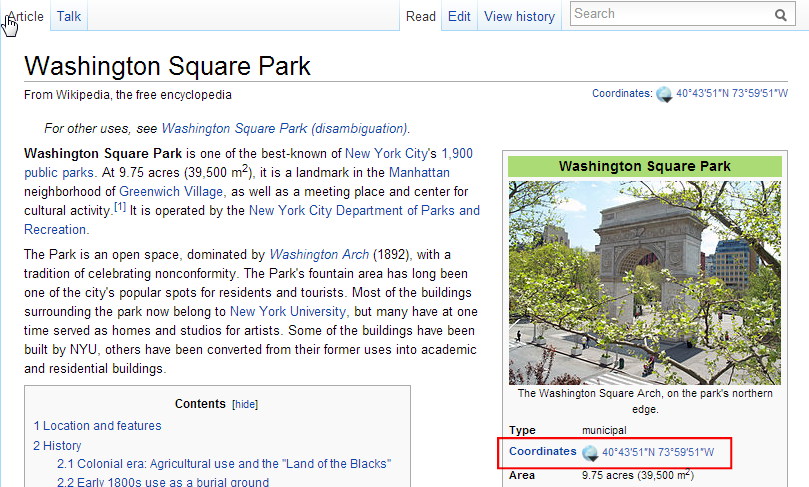
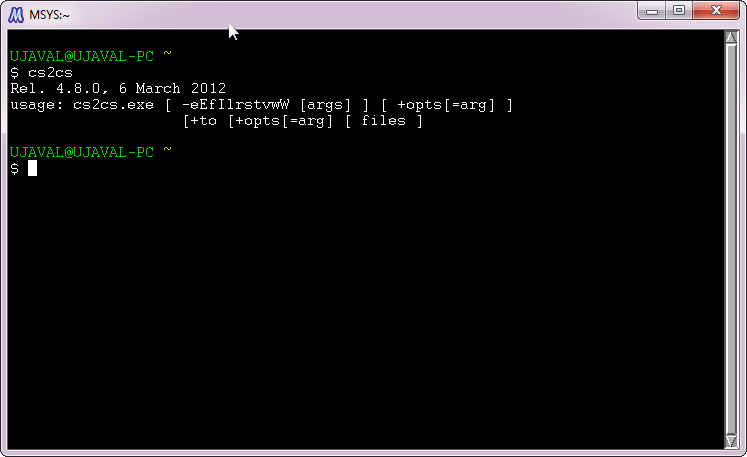
- You will notice that the coordinates are in Degrees/Minute/Seconds and are Latitude and Longitude. But since our layer is in Mercator projection, we will need Mercator coordinates to locate the park. Here’s where a command-line tool called cs2cs comes handy. If you have installed QGIS from OSGeo4W installer, you will already have it installed on your system. On Linux and Mac too, it comes pre-installed with QGIS. Launch a terminal window and type cs2cs to check if it is available. Windows users can find a terminal at Start ‣ OSGeo4W ‣ MSYS.
- Once you have verified that the cs2cs tool exists on your system, it is time to convert out Latitude and Longitude to Mercator coordinates. The way this tool works is that you need to specify a source and destination CRS. The CRS definition could be a PROJ4 string or an EPSG code. Since we already know the EPSG code for out input and output CRS, we will use this. The simplest way to use the tool is to supply the input coordinates on the command line itself. Note that the tool accepts coordinates in the order X Y, so we need to enter Longitude Latitude.
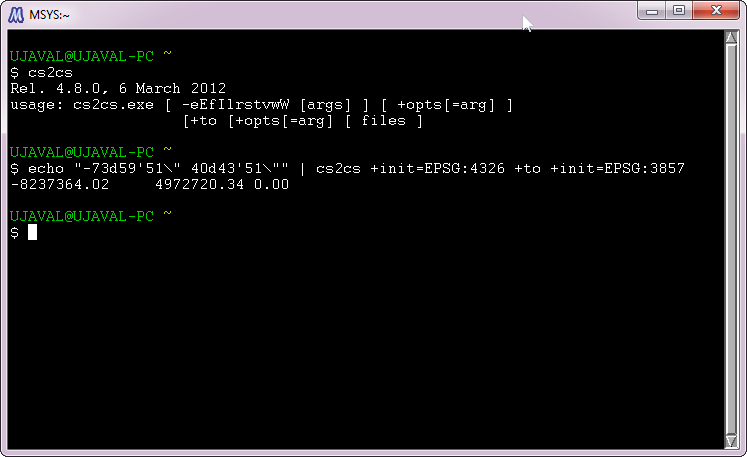
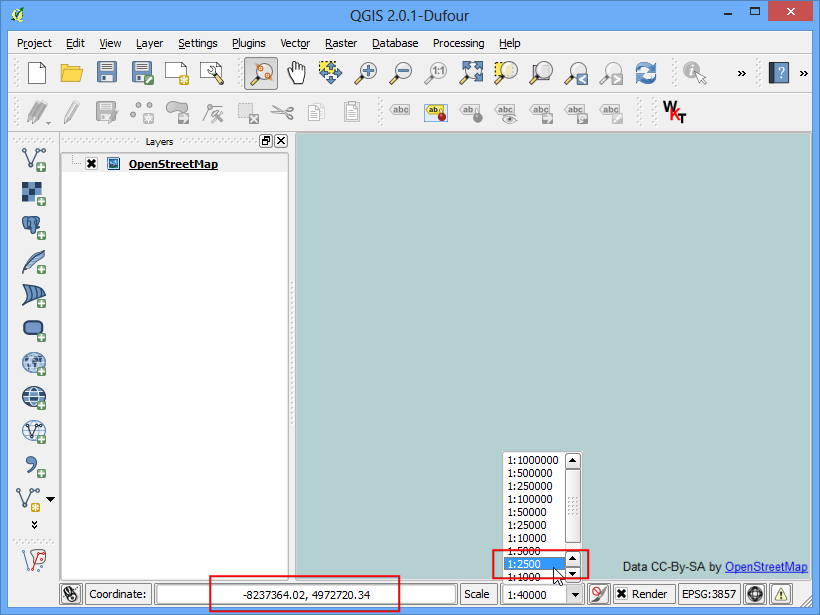
- Once you press enter, you will see the tool process the coordinates and print out output X Y coordinates in EPSG 3857 CRS. Copy these coordinates and switch to QGIS. At the bottom of the QGIS window, you will see a textbox labeled Coordinates. Enter the coordinates there in X,Y form. Press Enter. You will see the map shift a bit, but not zoom. To zoom to the area, select 1:2500 scale from the Scale drop-down next to the Coordinate box and press Enter.
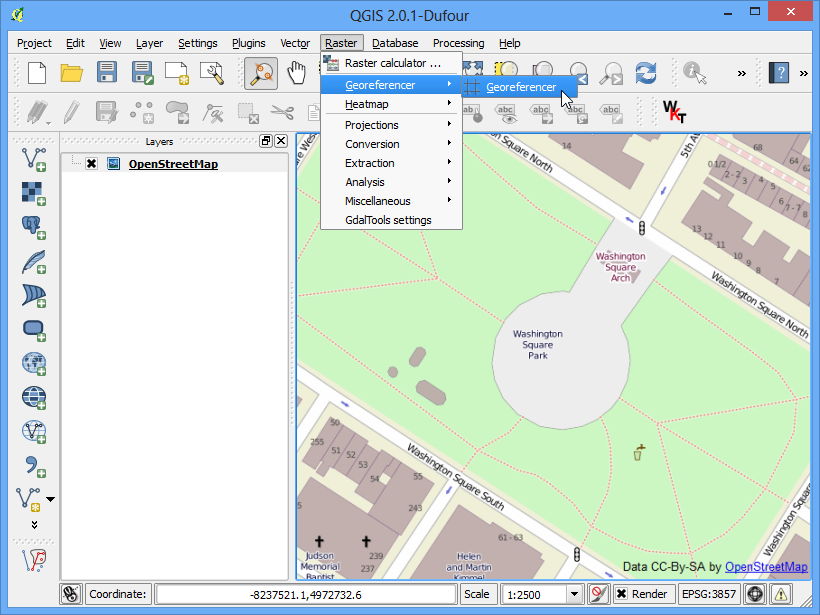
- Voila! you now see Washington Square Park area on your canvas. Now it is time to start georeferencing. Launch the Georeferencer from Raster ‣ Georeferencer ‣ Georeferencer. If you do not see that menu item, you will need to enable the Georeferencer GDAL plugin from Plugins ‣ Manage and install Plugins ‣ Installed.
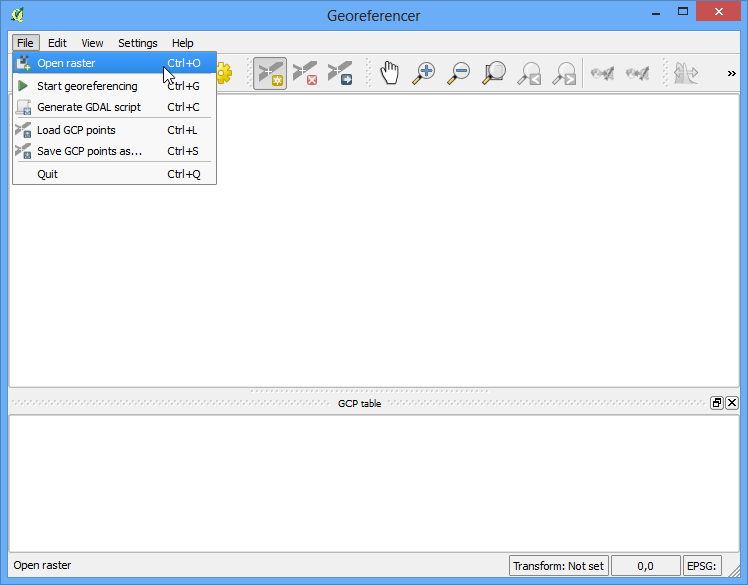
- In the Georeferencer window, go to File ‣ Open raster. Navigate to the downloaded JPG file and click Open.
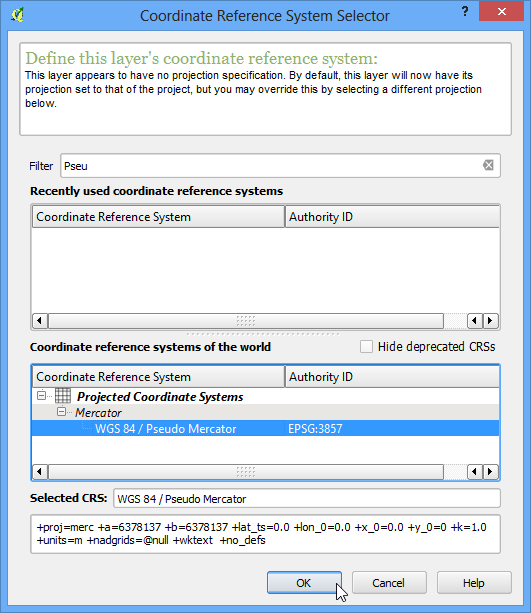
- In the Coordinate Reference System Selector, choose EPSG:3857 Pseudo Mercator
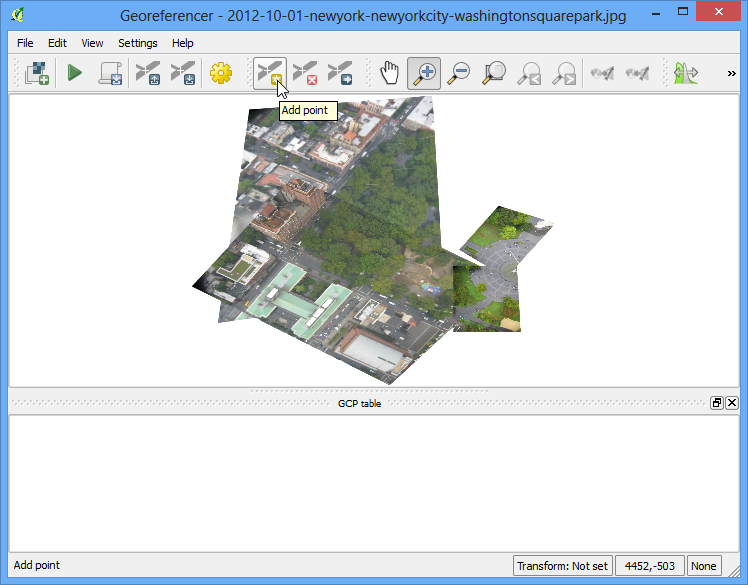
- Now click on the Add Point button on the toolbar and select an easily identifiable location on the image. Corners, intersections, poles etc. make good control points.
- Once you click on the image at a control point location, you will see a pop-up asking you to enter map coordinates. Click the button From map canvas.
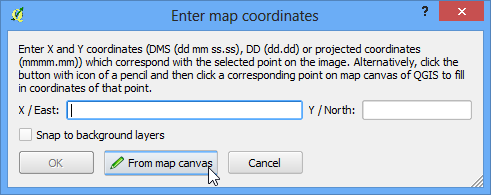
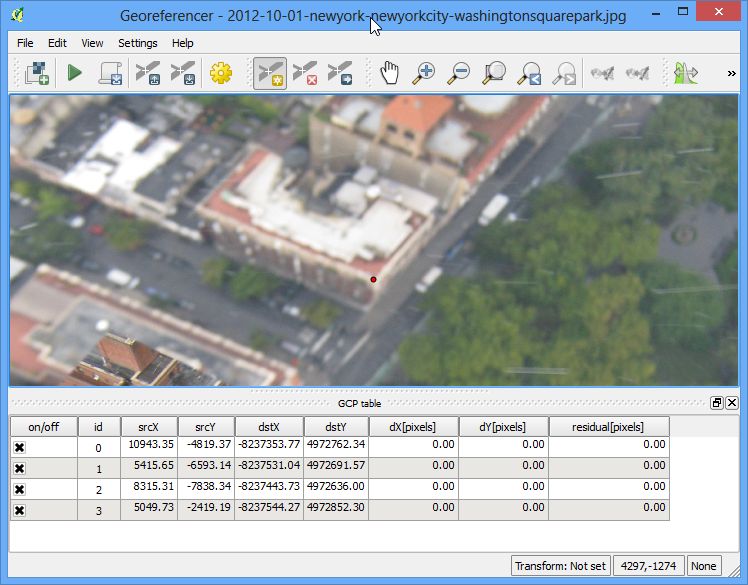
- Find the same location in your reference layer, i.e. the OpenStreetMap layer and click there. The coordinates are auto-populated from your click on the map canvas. Click Ok. Similarly, choose at least 4 points on the image and add their coordinates from the reference layer.
- Now go to Settings ‣ Transformation settings.
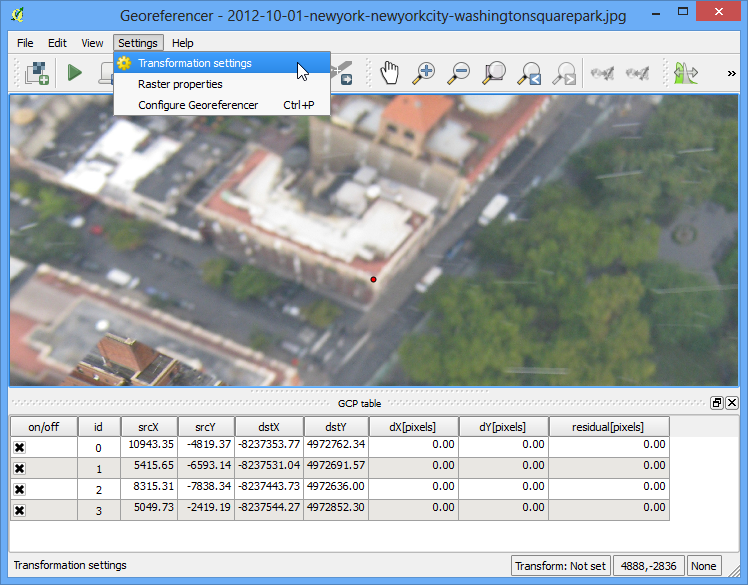
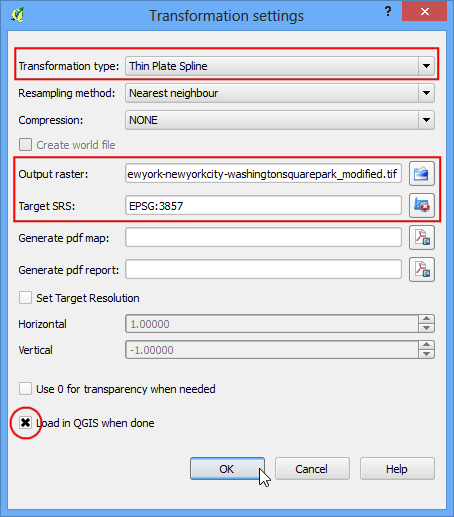
- Choose the settings as shown below. Make sure you the Load in QGIS when done button is checked. Click OK. Back in the Georeferencer window, go to File ‣ Start georeferencing. This will start the process of warping the image using the GCPs and creating the target raster.
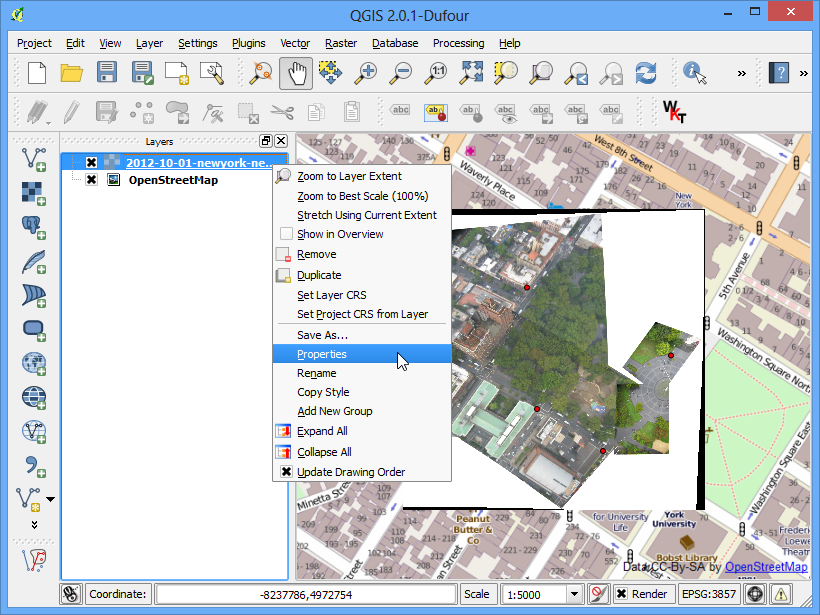
- Once the process finishes, you will see the georeferenced layer loaded in QGIS. If all went well, you will see it nicely overlay the OpenStreetMap layer.

- To make our output look nicer, let’s remove the back and white no-data values. Right click on the image layer and choose Properties.
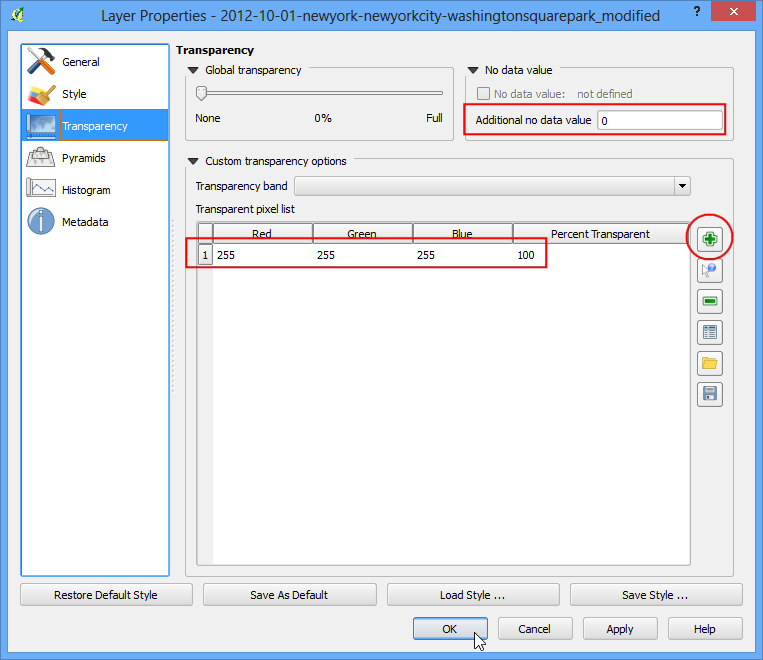
- Switch to the Transparency tab. We want to indicate that any black or white pixels in the image are no-data values and should be made transparent. Input 0 as the No data value. Also, in the Custom transparency options, click the + button and add 255 as the transparent pixels for each band and enter 100 as the :Percent transparent. Click OK.
- Now you will see your georeferenced image nicely overlaid on the base layer.